Applying a new speaker cloth
The
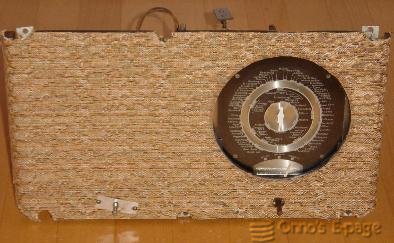
B7X63A I acquired in 2008,
had a torn and badly stained speaker cloth.
Through the Dutch association NVHR, I had come in contact with
Corrien Maas,
a very special weaver,
whose passion it is to help out
radio collectors by reproducing impossible to find speaker fabric.
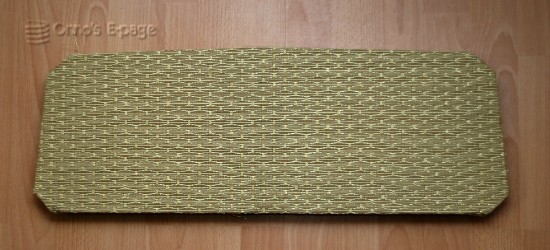
She approached the original as close as possible and made a few
test fabrics for me.
On this page, I will describe the steps I took to prepare the new speaker
fabric and glue it to the baffle.
This wasn't my first speaker cloth repair.
At the end of the page I will
treat some other methods I have used in the past.

Preparing a frame
The method I used to attach a new speaker cloth to the baffle of an old radio
has previously been described in the March 2001 issue of the
NVHR magazine,
“Radio Historisch Tijdschrift”.
The fabric needs to be stretched and straightened to make sure
it will be perfectly straight and will not become floppy.
So my first step was to construct a rectangular frame to fix and stretch
the speaker cloth.
I measured the size of the baffle and piece of fabric.
From a few scraps of wood I made a rectangular frame that was about 2 cm
smaller than the piece of fabric.
The fabric was only 4 cm larger than the baffle so I didn't have much margin.
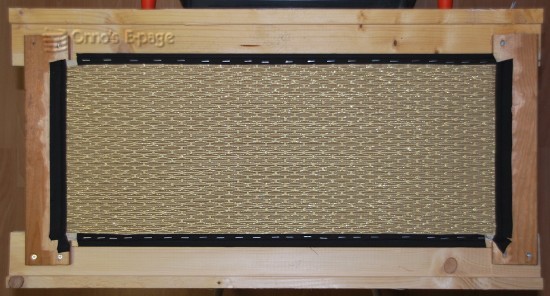
Fabric to the frame
The next step was to glue the fabric to the frame.
As I said, I only had 1 cm of slack.
Using string sticky tape (not as strong and sticky as Duct Tape, as I
was afraid to pull strands from the fabric), I attached the
fabric to the frame at the short sides.
I made sure that the sides of the fabric were parallel to the
frame.
After that, I squirted white wood glue between the fabric and the
frame and left it to dry for a day.
After a day, the fabric was stuck to the short sides of the frame.
I could now increase the tension.
I did so by unscrewing one of the sides and driving two wedges
(halves of cloths pins actually) between
the side and the long sides of the frame.
When I had a suitable tension, I fixed the sides again.
After that, I used tape again to straighten the fabric and attach it to
the long sides of the frame.
When it was straight, I squirted glue again and waited for another day.
I also stapled the tape to the long sides, as I was afraid that
the adhesive of the tape might come loose before the glue was cured.
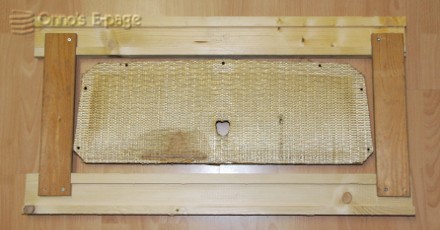
Detaching the old fabric
Getting the old fabric off the baffle was easy.
I used warm water with a bit of dishwashing detergent and wetted the
surface of the fabric.
I could pull off the fabric quite easily, except for the spot where a
previous owner had used white glue in a repair attempt.
Left-over strands and specks of glue could be easily removed using a
putty knife.
What adhesive to use
There are several options for the adhesive to use.
- White wood glue (usually PVA suspensions).
This is a modern easy alternative. It has a few disadvantags though.
First, most white glues cannot be dissolved after curing.
Most of them do soften when treated with warm water, so you can take
things apart, but you may damage the fabric.
Secondly, glue stains in the fabric are generally impossible to remove.
- White paper glue.
Some types of PVA glues can dissolve in water after curing.
They are sometimes sold for use by children, as most parents like the
idea of stains in clothing being able to be removed in the washing machine.
I have used such an adhesive for paper, but I wouldn't trust it to keep
a speaker cloth in place for more than 10 years.
By the way, not all white glues intended for paper can be dissolved.
There are types of super strong white PVA-based wallpaper paste.
I once used such stuff to stick heavy wallpaper
onto PVC wallpaper.
It worked fine, and I don't think that adhesive can be removed.
I have used the same paste to fix a corner of the speaker fabric of my
Philips 170A radio, because I needed
really strong adhesive to keep it stuck to the baffle after stretching
the fabric.
- Rubber cement (known as “Bison Kit” in The Netherlands) or
transparent contact adhesive.
Really a bad idea, though it might work for a while.
You will have to apply the rubber cement to both sides to be joined,
the fabric and the baffle.
It sticks at first contact, so make no errors, it can't be moved if you do.
Stains can be removed using thinner.
The worst thing is, these types of glue will dry out after 10 years or so.
Even the transparent varieties will turn dark brown by the years,
making stains uglier.
- Strong starch based wallpaper paste.
Some collectors say in wallpaper paste was used in the Philips factories.
On my Philips 470U I glued the new
fabric using a strong mix of strong starch based wallpaper paste.
The result is still fine after 6 years, but looking at old wallpaper
in my house coming off here and there,
I do have my doubts whether the fabric will still be
snugly in place after a few decades.
- Bone glue.
A traditional type of glue for strong bonds, often used by
artisanal furniture makers.
It can be detached by using heat and water.
The use of bone glue for speaker fabric was advised by a merchant selling
the stuff on one of the NVHR swapmeets.
I had my doubts at first. After all, it's a traditional artisanal type
of product, not a twentieth century industrial material.
But I decided his claim might be plausible, so I tried it.
Of course, one would like to use the same material that was used in the
factory, but the information about this is scarce and sometimes contradictory.
I decided to try the bone glue.
Before doing the real thing, I warmed up an amount of glue and glued an
old T-shirt to a piece of wood.
That worked well, though the fabric could be fairly easily be torn loose,
except for the spots where the glue was still really fresh
when the t-shirt was applied.
As you will understand, the glue will cool down quickly after application,
becoming less liquid and less adhesive.
But it was strong enough, even on places where the fabric could be torn loose.
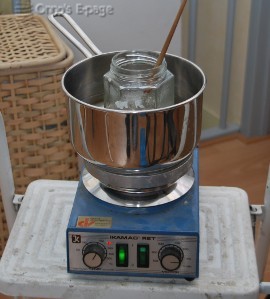
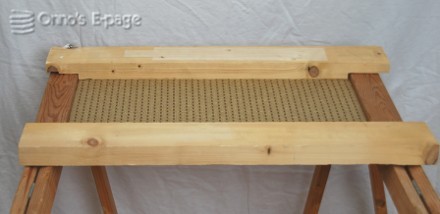
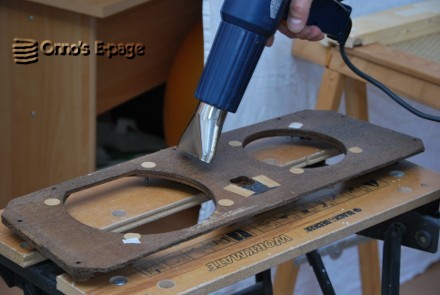
Glueing the fabric on
I took the frame with the fabric and put it upside down on a pair of supports.
I placed a lamp under the frame so I could easily align the baffle to
the strands of the fabric.
First I put the jar of glue in a bowl of hot water on an electric heating plate.
Stirring the glue with my left hand, I started to warm up the baffle using
a hot air gun in my right.
This took about 15 minutes. When I thought the baffle had warmed up
sufficiently,
I took a brush and spreaded the glue over the baffle quickly.
When it was all wetted with glue, I picked it up it and
put it upside down on the fabric in the frame.
The purpose of the frame is to stretch the fabric so it will have a good tension
in the speaker opening.
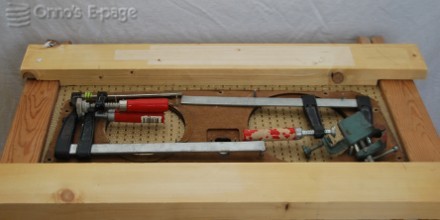
To tension the fabric a bit more, I put
some extra weights on the baffle.
I pressed the fabric against the wood to make it stick better, and
waited for the glue to cure.
That didn't take too long, only a few hours.
I carefully cut the fabric from the frame and heated the jar of glue again.
Then I dabbed the sides of the baffle with glue and folded the fabric
around the sides.
Messed it up a bit
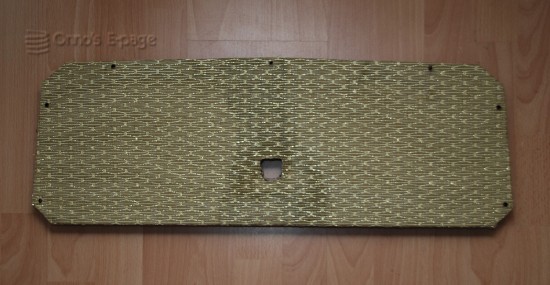
The next day, I cut off the excess fabric on the sides and I cut the hole for
the tuning indicator in the middle.
The fabric was a little bit loose around the hole.
I thought I could easily fix that by reactivating the glue.
That was a mistake...
I ironed over the baffle near the tuning indicator, using a damp tea-towel
to add extra moist.
This worked a bit too well, so that
the liquified glue came through the fabric on
the places where ironed, causing stains.
That wasn't funny.
After letting the glue cure again, the stains were slightly less visible.
But they are still there...
I tried to clean the fabric surface using a brush and warm water with
dishwashing detergent. That didn't really help, things seemed to get worse.
So I gave up and hoped that the stains would eventually
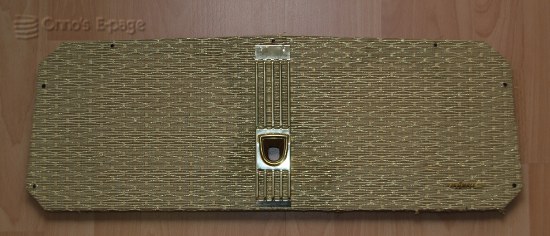
be camouflaged by the ornaments on the baffle.
I mounted the vertical bars and the window for the tuning indicator.
As my wife said: if you don't know it, you don't notice. So I hope.
After this, I mounted the baffle in the cleaned and polished cabinet
and finished the repairs to the
B7X63A.
Other speaker cloth experiences
On earlier occasions I have fixed the speaker cloth of three other radios before
the
B7X63A:
On the Philips 470U I
bought a custom fabric by
Corrien Maas,
Here, I used the frame method for the first time, but I used
a different type of adhesive (wall paper paste).
On the Philips 170A
the fabric had come loose at the lower left hand corner.
It looked warped and loose.
I didn't want to detach it for fear of tearing the fabric,
so I reattached the corner using strong
white glue.
In order to stretch the fabric, I stuck Duct Tape to the side and pulled
the fabric straight by the tape.
This was a risk, but I was lucky and didn't tear the fabric nor did I
pull out many strands.
The result is quite reasonable, but the lines in the fabric aren't
perfectly straight.
On the Philips 667A I restored in 2005,
I decided to go cheap and use the fabric from a spare BX560A baffle I had.
This type of fabric is not identical, but it is good enough.
The piece of fabric was only just large enough.
Having no margin at all, I couldn't use a frame to stretch the fabric.
Instead, I used duct tape to stretch the fabric and fix it to the
baffle while the glue was drying.
The result was not bad, although after 4 years, the fabric is a bit floppy
in the baffle opening.
So there are many ways to vary. Try if you like but at your own risk.
Copyright © 2010 by Onno's E-page
published 2010-04-18, last updated 2010-05-05