Frank Bemelman Clock
I'd call this a typical modern nixie clock.
It is compact and microntroller driven.
This clock has been designed by
Frank Bemelman.
It is really a good design.
Frank made it straighforward enough to make it into a kit.
Well, not a kit to be built by just anyone, but it can be reliably
reproduced.
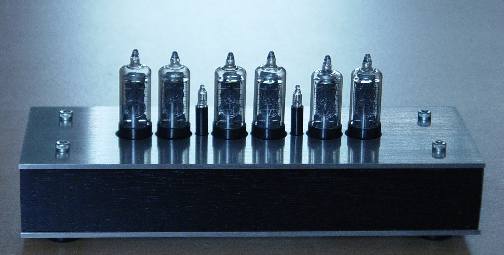
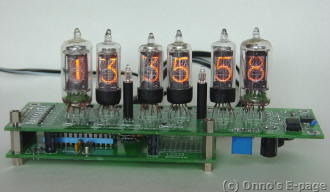
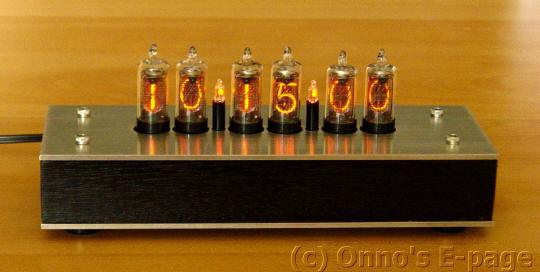
This clock has 6 Hitachi CD88 nixies and two small neon lamps that are used
as flashing colons separating the hours, minutes and seconds.
On the inside, there is a PIC microcontroller that does the timekeeping,
control and multiplexes the nixies.
The electronics are placed on two circuit boards, one for the display and
HV electronics (well HV, it's only 165 V), the other for the
microcontroller and the control button.
The HV for the nixies is generated by a small flyback converter using a
MOSFET and a small inductor. Very clever indeed.
The clock can be powered by any 12V-300mA supply.
The time reference is derived from the microcontroller's clock crystal.
There is a software routine to callibrate the clock.
This is very clever and saves a trimming capacitor.
Although the circuit board has been designed for CD88's,
I wanted to see if I could fit larger nixies because the CD88 is so small.
I also had a couple of CD72 nixies. These are slightly larger and
have the same connections as the CD88.
I put two of these on the board, on the photograph these are
the tubes on the left and on the right.
Surprisingly, the digits of both types of nixies turned out to be equal in
size, though the diameter of the CD72 is wider.
As you can see, the CD88's give a nice bright digit.
I think they look even better than the CD72's so I
decided to forget about using larger nixies.
Frank published his design early 2002 and I bought a kit from him
in summer 2002.
The kit was easily assembled, and worked right away.
Setting the clock is done by pushing the single control button.
It's good that a manual came with it, because without it,
I wouldn't have known how long to push the button to go into
time set mode.
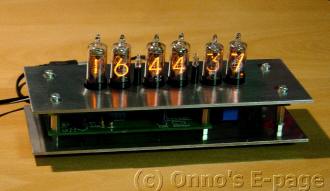
After fiddling with it a bit, I mounted 6 CD88's and added the
stainless steel top and bottom plate that are part of the design.
That looked better immediately.
After that, I made a few small hardwood panels and painted them black
and added them as the sides of the case.
The finished clock looks quite good.