The Plan
One day my son told me he wanted to play the guitar.
Electric, of course.
I jumped on the occasion and proffered to build
him a real groovy sounding valve amplifier.
I wanted to build an amplifier that does
not only sound great and looks good,
but that is also sturdy and safe.
After some deliberation I decided to build a 10-15 W amplifier,
roughly based upon the VOX AC15 design.
My Elektor valve amplifier book pinpointed it
as the amplifier shaping the sound of the
Brit pop in the sixties and loved by many guitar players.
I also got a lot of inspiration from
Jheijers site
who describes his VOX AC-15 clone in great detail,
mechanical as well as electrical.
The AC15 is from 1960, when the use of
distortion and guitar effects was just beginning to catch on.
It has 2 separate pre-amplifiers:
one clear channel and one with a tremelo/vibrato unit.
It has a characteristic sound.
Some people call it bright, others somewhat tinny.
My version certainly answers to that description.
Building the amplifier
After building a
first prototype,
I decided to use different transformers and make a new chassis.
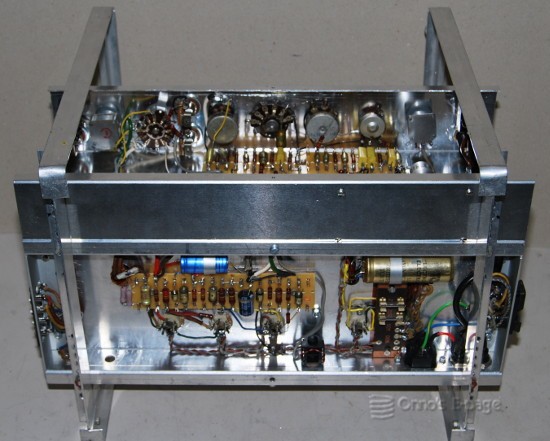
I built the
new power amplifier and tested it.
Then it was time to assemble the
pre-amplifier and join the two
to form the L-shaped amplifier chassis.
I mounted the chassis in my “service brackets” to
be able to handle the chassis and make it stand upside
down during measurements and modifications.
Powering up
After joining the two chassis and
interconnecting them, I thoroughly checked the circuits
against the schematic diagram.
I inserted the 3 pre-amplifier valves only, no
rectifier valve yet.
I connected the power cord and switched on.
Monitoring the DC heater voltage, I saw that the heater
supply was working fine.
Then I connected the load resistor and hooked up my scope.
I inserted the rectifier, output valves and phase splitter
and switched on again.
The voltage on the buffer capacitor
rose to 338V and then dropped to 286V.
I checked the voltages in the pre-amplifiers and was
satisfied to see that these were well within range.
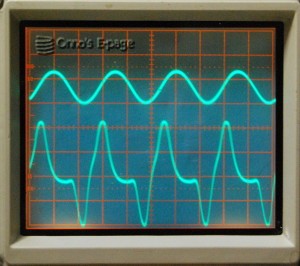
Then I connected the input signal.
Both pre-amps were working excellently.
The “clean” channel turned out to be much more sensitive
than the “tremelo/vibrato” channel.
Using the “cascade” position of the clean
channel, I was able to overdrive the input of the
“tremelo/vibrato” channel and get
a fair amount of distortion.
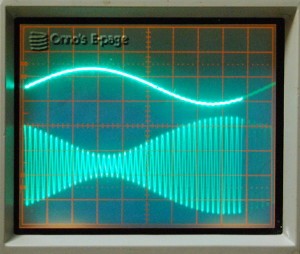
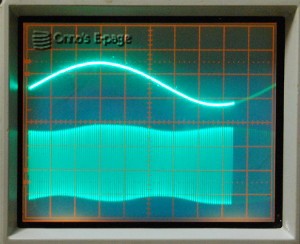
Then I inserted the VLF oscillator valve.
and saw the output signal started wobbling.
I could control the speed and depth.
In the “tremelo” position of the
“tremelo/vibrato” switch the
amplitude variation was more visible than in
“vibrato” position.
Triggering to the VLF oscillator at low time base speed,
my scope could visualise the action of tremelo and vibrato.
Well, not completely, as the phase shifts are not
visible.
First time live
Time to make music.
I connected the amplifier to a speaker and
my son plugged in his guitar.
We were not disappointed at all.
This amplifier had a nice smooth sound.
Quite bright on the clean channel, more veiled on
the “tremelo/vibrato” channel that already
has a really
interesting sound without the “tremelo/vibrato”
function on.
The vibrato and tremelo functions give something
extra to slow songs.
My son liked the distortion caused by the two pre-amps at the
“cascade” position of the clean channel.
The distortion does not make chords unrecognisable,
you still hear the music.
Compared to it, the
Bedrock
sounds a bit harsh.
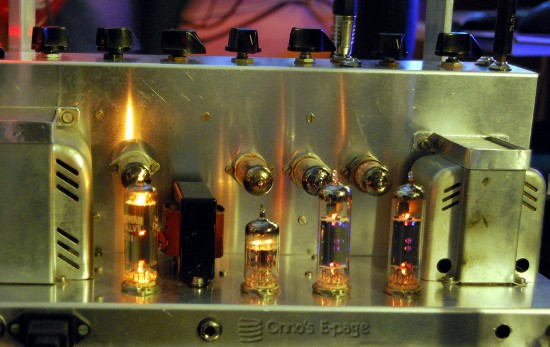
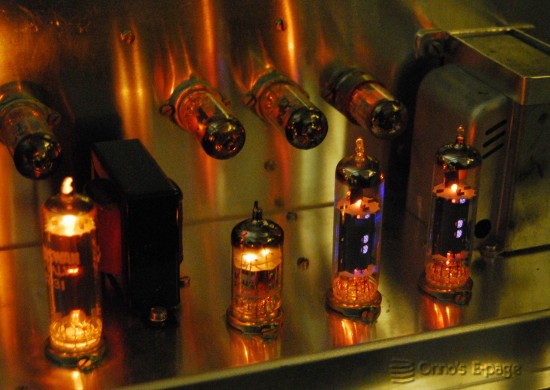
When I switched off the lights, the inner
beauty of the valves became visible: the glow of the cathode
and heater and the blue haze within the output valves.
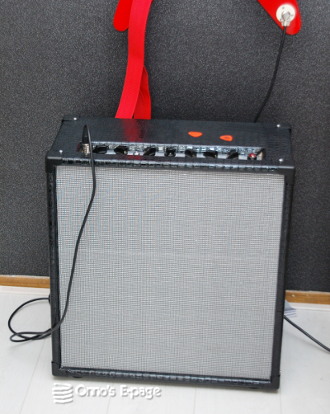
Then it was time to start
building the cabinet.
I covered the cabinet with shiny snakeskin Tolex.
Then
I mounted the speaker on its baffle board,
put the amplifier on its carrier board and
put it in place.
We connected the guitar and tried the amplifier.
It was sounding really fine.
Again, a clean and bright sound. A pretty veiled
sound from the tremelo channel and deep tremelo action.
After a while, we really became quite fond of the
“vibrato” function, that actually does
sound like you are bending
the tone of your strings with a vibrating motion.
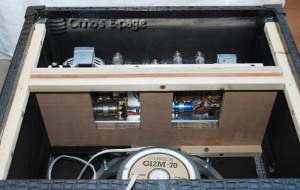
A few months later I picked up the project and
covered tha baffle board with speaker cloth.
Before that, I replaced the simple wood screws
that held the speaker by stronger M6 screws through the baffle.
You can see two of these screws on the picture that shows
how the chassis and its carrying board ar mounted
in the cabinet.
At this point, I also added corner pieces to cover the
corners.