Philips GM7635/01 Voltmeter (1953)
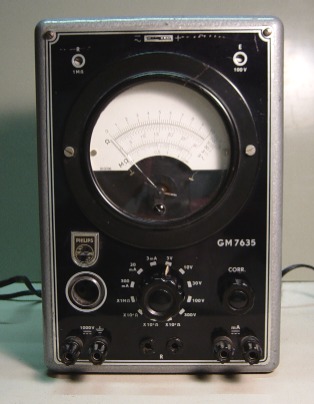
The Philips GM7635 is a valve voltmeter/multimeter.
It uses a simple bridge circuit with one valve and a potmeter.
This is a GM7635/01 dating from 1953.
Though a bit clunky, it is a nice instrument.
And its 4687 neon stabiliser really stole my heart.
The GM7635 is a valve voltmeter (or VTVM, if you like).
It is a DC multimeter with high input impedance.
A rectifier probe is needed for AC measurements.
The ranges are:
- 3-10-30-100-300 V DC
- 3-30-300 mA DC
- 100 Ω 1 kΩ
10 kΩ 1 MΩ
For AC voltage measurements, a probe with a built-in rectifier is used.
There are separate inputs for voltage, current and resistance measurements.
The design is still a bit awkward.
Later VTVMs all used a differential
amplifier with a double triode, but the GM7635 still uses a bridge circuit
with a penthode on one side and a potentiometer on the other.
Compared to the GM6004 this saves a valve,
but a neon stabiliser valve is needed to reduce drift.
By the way, I love this neon stabiliser.
The GM7635/01 has a hammered metal finish case which has been used by Philips
for measuring instruments in the 1950-ies.
Some production codes have been printed on the callibration potmeters from
1952 and 1953, so this instrument is probably from 1953.
The design of the original GM7635 is from 1949, the GM7635/01 is
using the same types of valves:
- EF6N as amplifier
- EA50 in the probe as detector
- EZ40 as rectifier
- 4687 neon stabiliser
I bought this meter in early 2003.
It was in reasonable condition but I didn't get any guarantee.
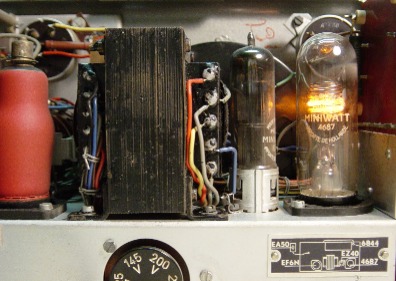
To investigate the inside, I took the chassis out of the case.
This GM7635 looked quite good.
Not much rust and no leaking electrolytics.
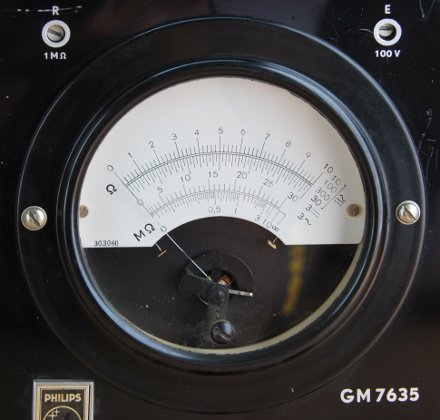
But there was a crack in the bakelite rim of the case of the meter movement.
And I noticed there was a recangular hole in the top of the case,
obviously a window to let the pilot light illuminate the dial.
It should have had some kind of plastic window pane, but that had disappeared.
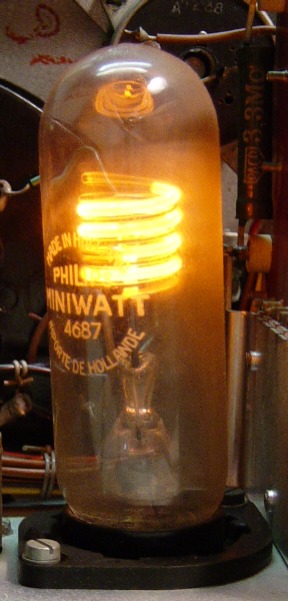
I tried it, and I was enchanted by the sight of the 4687 neon stabiliser.
This type has two spiral electrodes.
It did not ignite completely at once. The neon light started at the base
of the cathode spiral, and the crawled towards the end of the spiral.
The process took about 10 seconds. It was beautiful to watch.
I checked the voltages in the power suppy and they were ok.
Although the instrument still worked, the readings were incorrect.
As I didn't like the idea of exchanging a lot of parts in this
relic, I decided not to refurbish it.
The 4687's bulb was loose on its base, since the cement had dried out.
In order to prevent further damage,
I cemented it to its base using a rubber based foam glue.
After this, I put the GM7635 on a shelf to look at it every now and then.
In 2009, I had some parts from a GM6004, one of the parts being a
non-functional meter movement.
As the case of the GM6004 meter movement is identical to the GM7635's,
I was able to put the meter movement in an undamaged case complete
with the window for the pilot light.
So now my GM7635 is looking pretty again.
I only need the probe and its cradle to mount on the side.