Bush TR82C (1959/1960)
A classic British transistor radio from 1959 with LW and MW bands.
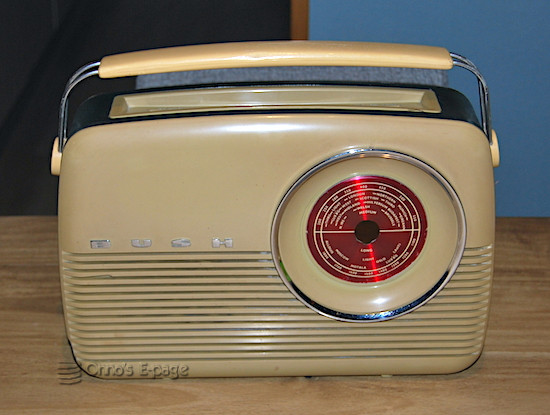
The TR82C as collected.
This radio has no PCB yet, but an aluminium chassis plate with components soldered on solder posts. The glass-cased germanium transistors are mounted prominently on top. The IF transformers and audio transformers are also mounted on top of the chassis. Apparently, the designers had kept a few habits from their earlier valve radios. It contains 7 germanium transistors, in this version they are:
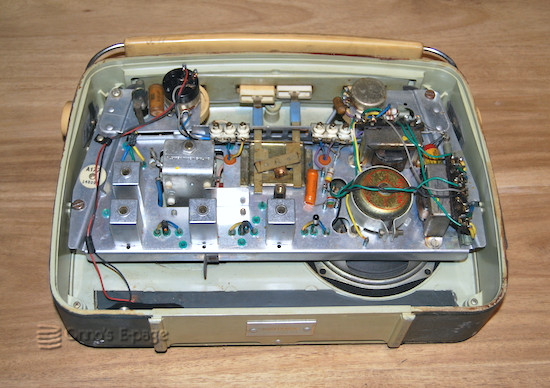
A view from the back at the chassis, revealing glass-encased germanium transistors.
This radio first needed a thorough cleaning. For this, I had to take it apart. First I pried off the tuning knob and pointer. Then I unscrewed the chassis. There were only three screws holding it and they were all different. Only one was the original Phillips screw I saw on photographs of other Bush portables on the Web. Apparently, somebody had been working on this radio before who lost most of the original screws.
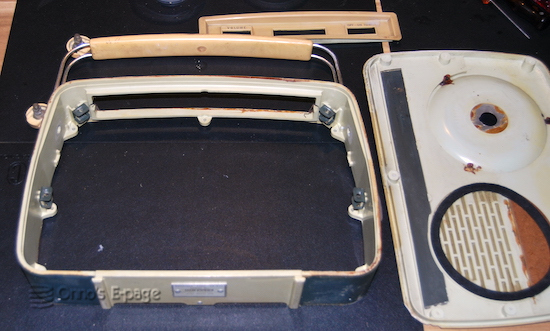
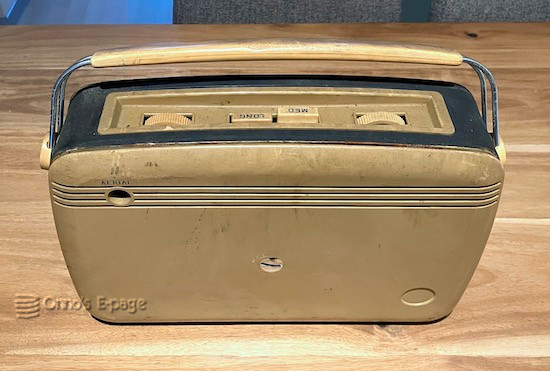
The case disassembled.
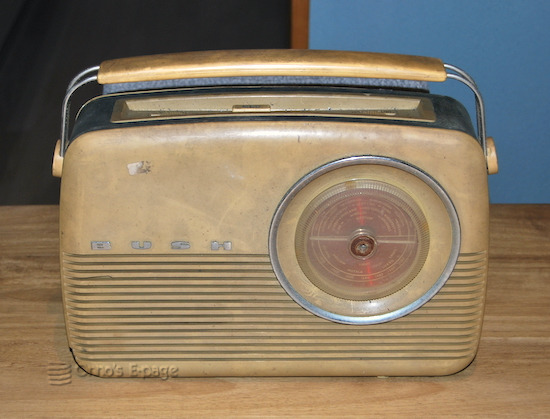
Then I polished the front and back panels using Brasso polish. The chrome circle received an extra polishing to remove the specks of corrosion coming through the chrome plating. The middle part of the case is covered with a blue linen based artificial leather. After cleaning, I polished it with a bit of furniture wax. This restored the blue color somewhat. The tuning knob, made of perspex, was also polished and was looking better but it remained a bit foggy. After reassembling, the case looked much better, although still yellowed. The layer of yellowed plastic was too thick to simply polish away. But I didn't dare to use a bleaching agent for fear of causing corrosion to the beautiful bright red tuning dial and the metal letters spelling BUSH.
Before trying the radio, I checked a number of components. I had a schematic so that helped. The waxy shell of the paper capacitors was a bit sticky but they didn't look very bad. I decided to keep them as none seemed to be critical regarding leakage current or loss factor. The band switch had blackened contacts. I cleaned them with ammonia first, then with a mild contact cleaner.

Plastic Plessey electrolytic capacitor, slightly bulging.
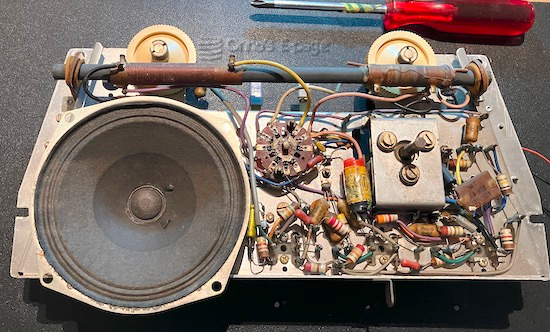
The chassis after cleaning and repair.
After this, I mounted the chassis back in its case. I found three acceptable replacements for the lost or misplaced screws. I pushed the pointer and tuning knob back in place and further reassembled the radio. I found a PP9 battery clip and made an adapter for a standard small 9V battery. So I was able to use the radio on batteries, as intended. Maybe it's a good idea to add a larger battery holder for "C" batteries. They will last longer and there is plenty of space for them.
Copyright © 2025 by Onno's E-page published 2025-12-04