Fixing a Krups Nespresso coffee maker
We got this Nespresso coffee maker in 2006.
From 2011 and on, the on/off button gradually
became less responsive.
Fixing this should be easy.
But manufacturers of household appliances
go in lenghts to put obstacles in the way
of the home repairman.
I was determined not to let them keep me.
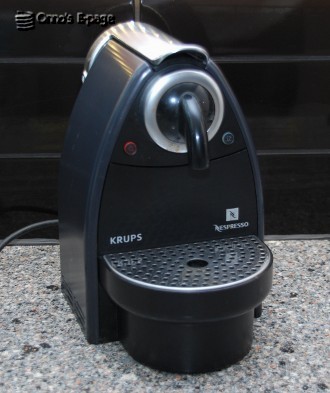
This coffee brewer by Krups uses the Nespresso coffee
capsules. Decent coffee, no need to promote that, I'll
leave that to George Clooney.
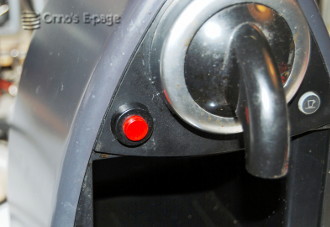
It has two push buttons:
- A red on/off button;
- A green start button.
These are silicon rubber buttons like the buttons on
your TV remote control.
The green one is actually white and translucent,
its color comes from a green LED.
When you push the red on/off button, the green LED starts to
blink as the boiler warms up.
When the boiler reaches working temperature, the green LED will
light continuously.
Pushing the green button will start the water pump
and percolate hot water through the coffee capsule.
After a number of years, the on/off button gradually became less responsive.
I wasn't really surprised.
These silicon rubber buttons are not the most durable type of switch.
They usually have a small pad of conducting (graphited) rubber that
is pressed against a PCB to connect two traces.
They can only handle a small voltage and current,
to provide an input signal to an electronic control unit.
I have had some experience in cleaning these.
That sometimes works, but there are occasions
where the black discs of conducting rubber seem
to have lost conductivity.
There are people who claim they have used conductive
paint to enhance the graphite pads, but I haven't tried that yet.
Late 2013, the switch became almost unworkable.
I decided to take the plunge.
If the buttons could not be repaired,
I could always replace them
by a standard pushbutton.
But first, I had to get into the machine.
Now Krups is one of those patronising manufacturers
actively hampering their customers' rights to
repair their own property.
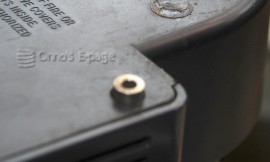
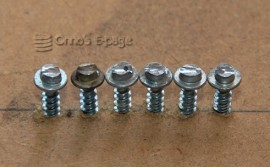
They have used 8 undriveable screws to keep the case
of the coffee maker closed.
I saw featureless cylindrical
heads that don't fit any type of screwdriver.
I first thought they were nails or rivets.
I found this quite aggravating.
Do they want to force me to buy a new one? Not this guy!
I remembered having read a blog on this subject before by Rolfje,
How to fix a Krups XN2001 Nespresso machine.
This home repair hero had found out
the nature of these screws.
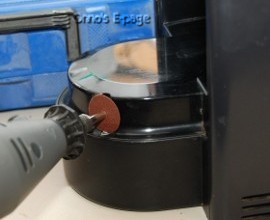
The first two of these screws become accessible
after the dripping tray is removed.
Using my Dremel tool with a thin grinding disc,
I could make a slit in the heads and unscrew them.
Two screws in the bottom I could remove just pinching them with a
pair of thin needle nose pliers.
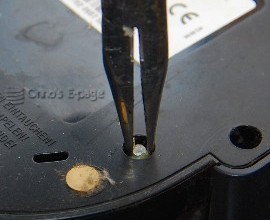
The four other screws are recessed 2.5 cm deep.
I could not reach them using pliers. Using thin
tweezers I could not exert enough force.
I extended the screws by glueing a nail the
heads using epoxy glue, but the glue turned out to be too weak.
I was able to unscrew
only one of the screws, with the other ones the nail came off.
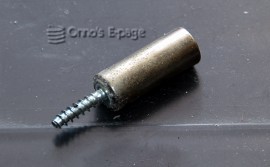
Then I glued a hollow metal cylinder to all three
remaining screws using cyanoacrylic glue.
That worked well enough.
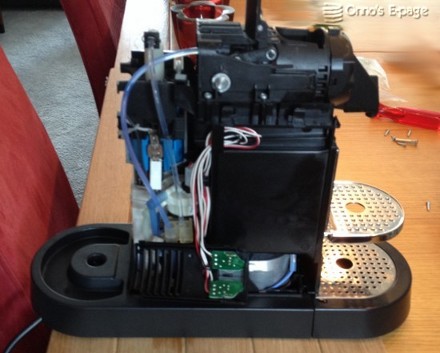
It turned out that these last four screws hold
the side panels, two for each side panel.
These side panels I needed to remove to get access to
the switches.
It turned out that the first four screws I had removed
hold the bottom so
I could as well have left them in place.
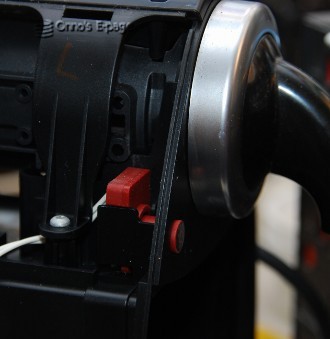
Inspecting the on/off button, I saw that the
PCB was slightly dirty and had some water traces on it.
I cleaned it using a cotton tip with
some contact cleaner and toothpaste,
then alcohol to remove any debris.
I cleaned the rubber contact pad using alcohol only.
Left the components to dry and put them together.
To my surprise, this worked right away.
The machine went on and off easily.
I cleaned the other button, too,
now I was at it.
I inspected the rest of the machine.
All components were looking fine.
One finding: according to a label on the
water pump, it may only be switched on for 1
minute, must then rest for 1.5 minutes (at 230V)
or 2 minutes (at 240V).
I don't remember this was in the machine's manual.
In order to be able to replace the screws, I
placed them in a row and using my Dremel and
thin grinding disc I cut a slit in their heads.
After that, I could replace them using a regular
flat-head screwdriver.
My father would have been be proud of me.
I was able to overcome the selfish, childish,
patronising, hostile, debilitating, irritating
obstacles that Krups put in my way to
prevent me from fixing
a technical object in my possession.
I was able to prevent wasting money on replacing
an object that could easily be repaired and I
have learned something in the process.
After making this report, I found there is a
whole blog on repairing various faults on these
Krups machines:
Great work!
There I learned that the heads on these screws are
actually not cylindrical but
but oval and that screwdrivers for them
do exist.

Same again a year later
One year after I fixed my coffee machine, the on/off
button was getting bad again.
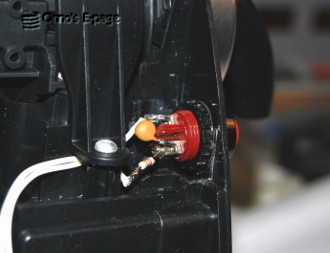
I decided to replace the button by a regular push button switch.
I selected one that was large enough to fill the
space where the old one was, that was round and that
did not have any metal parts on the outside.
The latter for electric safety. After all,
the circuitry is connected to mains.
I pulled out the old button, broke away the
support ridges for the PCD and cut away the excess plastic
using a chisel.
Then I enlarged the hole using a round file.
After this, I inserted the push button.
It did not work at first.
The machine switched off every time I released the switch.
I tried adding a debouncing circuit composed of
a 1 nF capacitor and a 470 Ω resistor.
Did not make any difference.
Odd. I measured the switch and slapped my forehead.
The push button from the junkbox turned out to be a
normally closed button.
Luckily, it was easy to reconfigure it
into a normally open switch.
Then it just worked splendidly.
And a XN7001 machine
Half a year after my first repair, my in-laws had a leaking
Nespresso machine and they couldn't find
out how to open it.
It was a Krups XN7001 machine.
It uses the same type of screw, but they are not
recessed so they could be removed using pliers and
some force.
Meanwhile I had learned a trick from
Chris' site
to make a tool from a hollow screw
from IKEA kitchens and make it oval by
pinching it using a pair of pliers.
I tried that and it worked fine.
To remove the side covers of this machine, you first have
to remove the bottom console.
The side panels have locking tags that prevent them from
being removed. After the bottom is removed, they can.
After that, it is possible to take off the
top cover and the panel holding the two
rubber push buttons.
We were not able to find a clear cause of the leakage.
Most of it lands in the dripping tray, which is ok.
The cause is probably some slack in the closing mechanism,
caused by using “compatible” capsules with
a hard rim.
The rim of the capsules must form a seal, but the
“compatible” capsules use different
material that is slightly harder, which may damage
the mechanism.
As a result, the seal is not pressure tight with all capsules any more.